Showing posts with label colette patterns. Show all posts

Friday, 26 August 2016

Hawthorn the Dress

 Hey look I'm over my writer's block after a few months of being super busy in the studio. 

 This is my first Hawthorn dress, but not my first Hawthorn rodeo. This time I kept it super simple with no sleeves or collar(aka I didn't have enough fabric. If someone writes this to my tombstone, I won't mind). It's a size 10 bodice with the changes I made to my Reversible Hawthorn Blouse. The skirt portion is a simple rectangular piece that's gathered in the waist. 


The fabric is a vintage cotton which I scored from an online auction ages ago but like most fabrics I own, it simply traveled to the stash to wait for its turn. I'm happy I chose the Hawthorn for this one. The seams are finished with the serger, the hem is overlocked and turned back once and stitched down. The armholes are bias bound and the neckline is finished with the facings that came with the pattern. I found these cute black buttons for fastening.


This has been one of my favorite pieces this summer. Simple and fun to wear and feels super comfortable.


Monday, 14 March 2016

Stewie Moneta

Heya. Today I'd like to return to a deeply loved pattern I haven't sewn in a while. The Moneta. This time it's in a fun Stewie Griffin print jersey that looks fun and carefree at first but true to Stewie's personality is filled with messages he would say.


Again, I sewed up size M with no alterations apart from shortening the skirt. All the seams are finished with the overlocker. the hem and sleeve hems are finished with twin needle. I sewed a strip of fabric to the neckline while slightly stretching the band and it gave me a nice finished neckline with a neckline band. I added an elastic silicone strip to the shoulder and waist seams for stability.


Other than that I have nothing to say except I love this dress, but you all already knew that because it's a Moneta and it has awesome print.


The fabric is from a remnant bin in Abakhan and it's so freakin' awesome, I could cry. I actually bought it with the idea of making a shirt or two for Mr.Man but that didn't happen and the fabric had been sitting in my stash for almost a year. But then we were going to see the latest Star Wars movie and I felt that I absolutely needed to make this fabric into a dress so I could wear it to the movies. With two hours left until the end of the work day and until I had to leave home for the cinema, I pulled out the fabric and was done with plenty of time left. Aaaaaaaaah, the joys of TNT patterns. They whip up so fast.


For previous Moneta versions I have made, follow these links:

Monday, 10 August 2015

Fancy Moneta

Yes. It's another Moneta. No, I am not sick of this pattern. Also. Getting from making this dress to actually blogging about it took me eight months. Uhhhmn, sorry?


This is my eight Moneta (Shoutout to one, two, three and four, five, six, seven.) so there's not much to say about it. It's a collarless size M with 3/4 sleeves. The fabric is a knit and lace combo where the lace is attached on the solid knit with an adhesive. I found it in the remnant bin that is next to the register at the fabric shop. They REALLY need to move that thing. It's not good for my wallet and stash diet.


I made the dress for a New Year's party at our place. I mean who doesn't want to look fancy as hell but still feel like wearing PJ's? However the idea to make the dress came to me on the 31st of December when I had one hour left until the end of the work day. But that didn't scare me. I have made this dress a bunch of times in the past so I know it's a quick project. And I already had black thread on my machine and serger. Win-win. I quickly cut it out and threw it under the machines. One hour and 15 minutes later, I was done. This is why TNT patterns are awesome.


I love-love-love this dress. Ever since I have worn it what feels a million times and I'm sure I'll wear it a million times more until it fades out and falls apart. It's so easy to throw on, put a belt on it and look like a million bucks.

Thursday, 2 July 2015

Sorbetto the Blue


I don't know if I've said it before here but I dislike the color blue. Dark blue jeans are okay, but other than that blue is not a color I like to wear. But there's something about this fabric that makes me temporarily forget that fact. I love this blue fabric!


The pattern I used for this blouse is the Sorbetto by Colette Patterns. It's a free(!!!) pattern and really easy to make. For my version I sewed up the size 8 with no alterations. I finished the seam allowances with my serger, roll hemmed the bottom and finished the armholes and neckline with bias tape.


The fabric is a lightweight cotton and feels so cool and airy. Which is awesome in the summer. And like I said before, I am surprisingly liking the color. I think the embroidery might have something to do with it. That's my favorite part about this fabric. Maybe if it were a plain blue fabric, I would hate it.


As the blouse fits me quite loose, I usually wear it tucked into a skirt(or in this case shorts). Don't know about you, but looking at this shorts-Sorbetto combo, I get a bit of a pinup vibe. I haven't tucked my shirts in my pants since forever, but I think I might make an exception when wearing these two together :)

Wednesday, 24 June 2015

Flowerchild Moneta

I think I'll skip a long intro this time because we all know what I'm going to say. I made a Moneta and I love it. Proof one, two, three, four, five and six.

As usual, I cut out size M but for this version I went for the scalloped collar and 3/4  sleeves. I serged all the seams and used a twin needle to hem the skirt and sleeves. The fabric is a viscose jersey and feels absolutely dreamy. Like wearing pajamas but still looking classy af.


I love the contrasting red collar especially when I pair the dress with a red belt. I feel like a little kid who plays a flower in a school play in this dress. But in a good way. If that makes sense.


Tuesday, 5 May 2015

Laurel The Muslin

Hi peeps, welcome back! Or if you are a first time visitor, I hope you'll come back in the future!


Sometimes a girl needs a simple dress from a simple fabric. Something to throw on during a warm summer/spring day. For a long time I have eyed the Laurel pattern for a while but kept doubting if the shape would flatter my body shape. But I decided to bite the bullet and pulled out the pattern, a piece of some cheap cotton I purchased some time ago for muslining and made a nice little wearable muslin.

I cut out Version 1 in size 10 and made a few fit adjustments. I had to take in the neckline at the shoulder seams by 1,5cm and the armhole at the shoulder by 0,5 cm. I also took in the back  by 2cm at the neckline, 1 cm at the waist and 0cm at the hips. As I shortened the armhole by 1cm in total, I also shaved off a bit from the sleeve head. But I think I didn't shave off enough, might have to do that for my next Laurel dress.


Instead of using the methods to finish the neckline given by the instructions, I finished the neckline with a nice little facing. I finished all other seams with overlocking and roll hemmed the sleeves and the hem of the dress.

Pardon the wrinkles, I wore the dress to a little family gathering before taking the pictures.

The dress fastens with an invisible zipper as per instructions. However I might put the zipper into the left side seam next time, we'll see how future me feels about that.


 All in all, I think the dress is awesome. True, the cotton fabric does wrinke a lot, but that's okay. And despite my doubts about the shape looking flattering, I think it looks great with a belt thrown on. Besides, during the summer I'd rather have something slightly too loose than too constricting.

Friday, 1 May 2015

Moneta in Red

Hello you gorgeous beast! How's it going? I've been busy with work and stuff. But in honor of Me-Made-May busting out all of it's cool moves, I'm going to attempt to blog about all of my selfish makes before they end up on my chronicles of Me-Made-May on Instagram and later as roundup posts on ze blog.

Today I want to share a cool Moneta with you. It's no secret that the Moneta is one of my favorite patterns as it's so easy to make and the possibilities are almost endless. I have made many versions before(see one, two, three, four and five) and I have a few that I have not yet gotten around to blog about but it will all be fixed in the future. My addiction to sew Monetas is at that stage where I realize that I have a problem and I'm trying to put the pattern away while I try different patterns in my stash but still think every time I go through my fabric stash "Oh this would make a great Moneta and this would make even a greater Moneta." Admitting you have a problem is one step closer to cure, right?

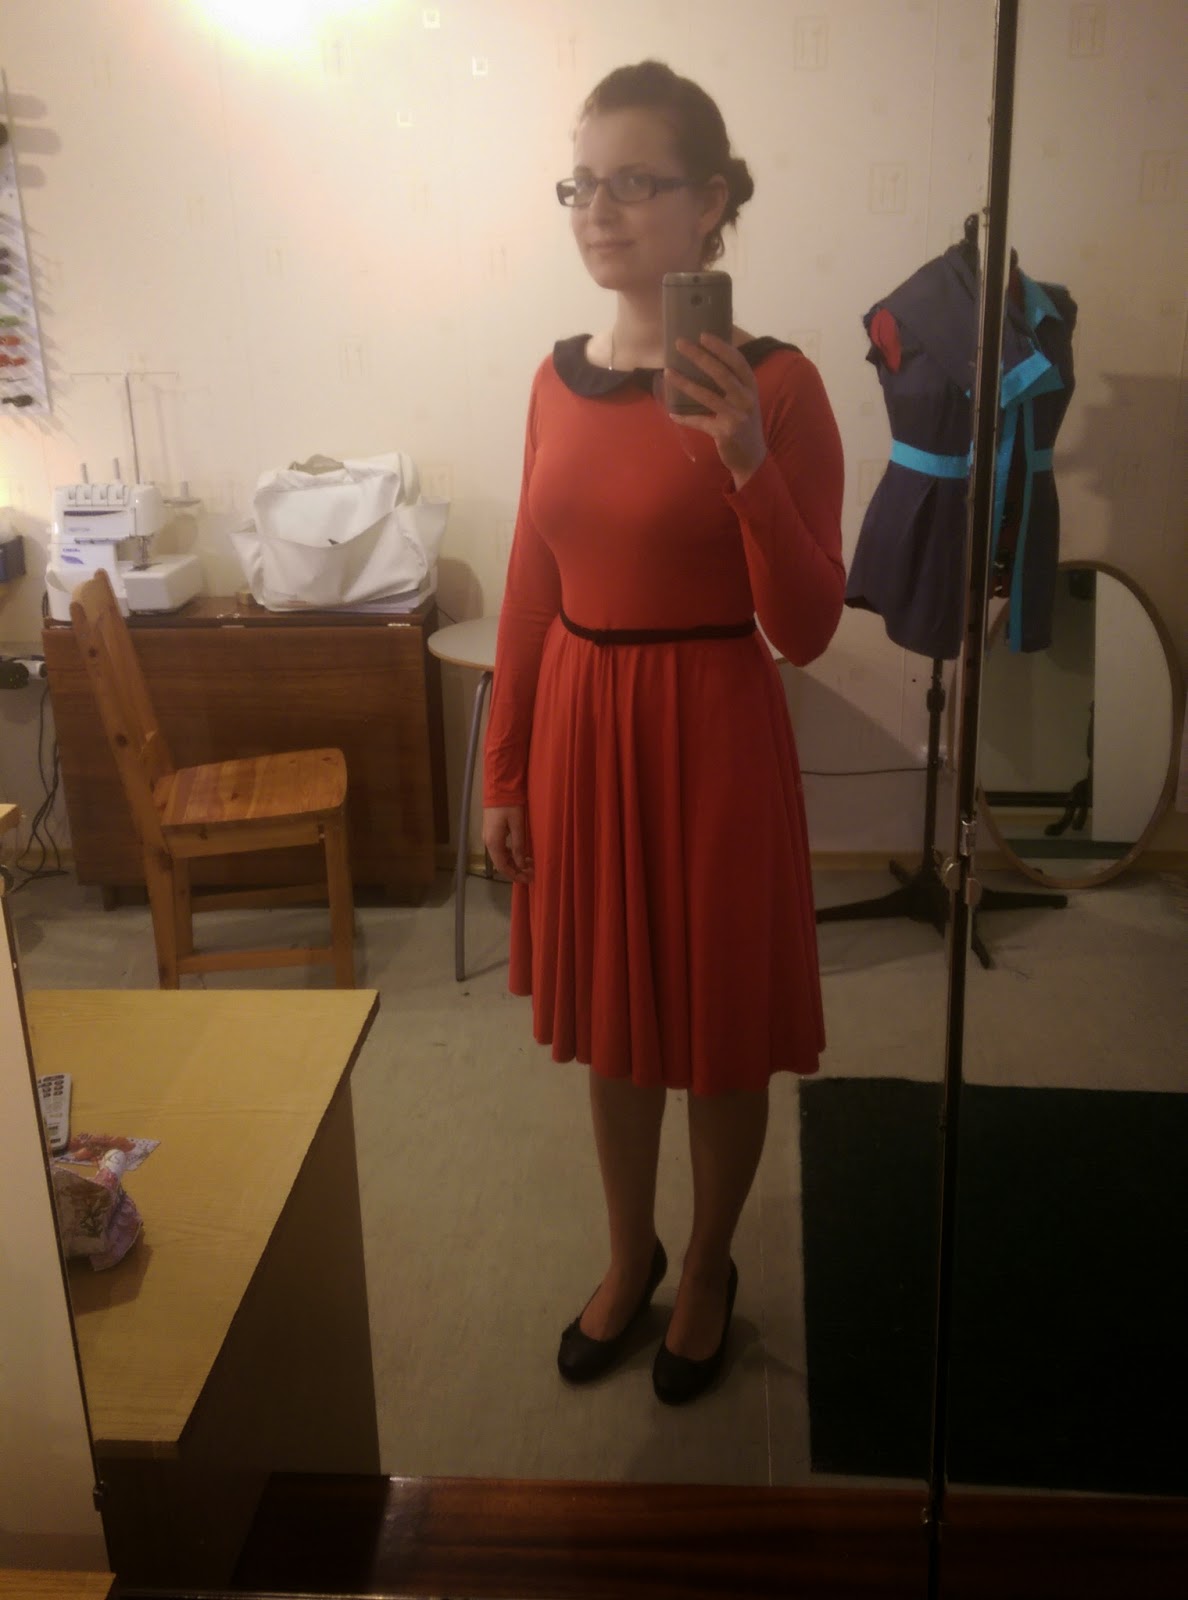
For this version I used the size M bodice and 3/4 sleeve patterns. But I wanted to have long sleeves on this dress so I lengthened the sleeve a bit to have a nice slim long sleeve. For the skirt part I drafted a full circle skirt and sewed it onto the bodice. And I decided to go for the Peter Pan this time. And as red+black is one of my favorite color combos of all time(along with red+white and white+black), I decided to make the collar from a piece of black jersey I had lying around.


The red jersey is a super drapey viscose jersey and it stretches like a *insert profanity* Everyone and their mom knows that you're supposed to let circle skirts hang for a while before hemming as it has the tendency to stretch in some parts of the skirts. I did that, evened it out, hemmed it, wore it, re-hemmed it, wore it and now it needs to be re-hemmed again. And I am seriously thinking of not bothering with it and pretending I totally wanted an asymmetrical look on the skirt part. I'm young and hip, I'm a rebel. Yeah.

Derp herp.

Anyways. I REALLY love this dress. And this is how I usually wear it (minus the 14cm heels). I feel a 100% better when I throw a belt over a dress and this belt I made on a whim over a year ago has gotten a ton of use since I made it.

Thursday, 19 February 2015

Hawthorn - The wearable insanity

What do you call a person who not only makes her muslins both wearable and double sided? Insane. I guess that's what I am because I did that. 

The story begins with this thing on the right. Somewhere around July and August my Gran M gave me this wrap skirt/apron thing. And I thought it looked absolutely hideous. I tried it on once and I felt like I was being eaten alive by a weird skirt monster. Not only was it way too big, it was also too long and looked awkward on me. Let me tell you, four layers of this thing was anything but flattering. So I threw it into the "Nope, not wearing that" pile with the thought of using the fabric to create something that looked decent enough to wear. Which was kind of doubtful as I didn't like the colour either. I guess one can only hope. A little later I started to toss the idea of turning it into a reversible top.


So I kept that idea in the back of my mind and one day I found the Hawthorn dress pattern in my stash and I knew that this was it. So I traced the size 10 pieces for the blouse option and decided to omit the sleeves as I didn't have enough fabric for them. After that I cut out the pieces from the fabric and sewed them together. Then came the tricky part. Fitting. I knew this would be the part where I want to toss it all aside and never finish the blouse because it was all wrong. There bodice was too long for me and it made a huge mess around the shoulders. The shoulder line was too high and it was a hot mess. The other big issue was the shape of the bust dart. The shape was wrong and I needed to adjust them. So I lowered the shoulder line by 2,5cm from the neckline and 1,5cm from the armhole side. So not only was the shoulder too high for me, the angle was off as well. Blame my short torso and weird shoulders(I have the shoulders of a man, haha) I also took in the side seams by 1cm.


As you can see in the picture above, the original bust dart shape(grey) is really different from the one I ended up with(green). This right here is the reason why most RTW fitted tops and dresses don't fit me. The darts are wrong for me. 


So here's the final result. Right now the fit is a bit too snug. Damn you, holiday food! But I'm working on losing all of that extra padding so, it should fit me better again soon. On this side, I made the floral peplum layer a bit shorter(I ran out of fabric). This is a bit more modest side, I think with only a bit of floral pattern on the collar and peplum.


I used snap buttons instead of buttons. Mainly because buttons are tricky when you need them to function both way. And because I am lazy and find myself hating the process of getting dressed every time I have to close SOOOOOOOO many tiny buttons. Ain't nobody got time fo dat.


And this is the side that I think looks more loud. However as the color itself is kind of quiet and not all up in your face, it's still not really that loud. I love how the floral peplum still is seen through the solid layer. Plus it eliminates all possibilities of my tummy flashing itself. Which is another win in my eyes. On this side the snaps are little silver rings while on the other side they were white little dots(Almost like buttons). 


As you can see, I topstitched the collar and the front. I finished the hem with teeny-tiny baby rolled hem. To avoid any serged edges peeking through while wearing, I finished the peplum seams with flat felled seams. 

Also. The story is not over yet. Picture me in my sewing room, all giddy about finally finishing this thing and still unsure if I would ever wear it for real because of  my dislike of the color. I had just attached the peplum to the bodice(I had sandwiched the bodice between the peplum) and done the topstitching over that seam line. And here I was, trimming down the waist seam allowance so I could do the final topstitching on the front seam and then attach the snap buttons and then.......................


THIS happened. You know when everyone keeps telling you that you should be super careful when trimming seams. This is why. I had been reckless and I was staring at the result of that. I did not know what to do, to cry, yell, laugh or chuck the whole thing into the bin as it's clearly cursed. So I did what anyone would do. I Instagrammed it. And then took a lot of deep breaths and took my good friend seam ripper to rip up the waistline seams. Then I lowered the seamline on the bodice by as little as I could to hide that notch but still maintain the length I wanted. Everything after that is ancient history.


I have been trying to think what the real moral of this story is. And I can't say there is only one. There are three.
1. Don't hurry and pay attention to what you are doing, dum-dum
2.Use interfacing that is more similar to the main fabric when working with slightly sheer fabrics. I really should have used a purple/pink interfacing instead of white.
3. Never say never. I actually like this thing. I still dislike pink/purple/blue but I really like how this blouse looks on me. I might be actually crazy. Probably left the last bits of my sanity to the part where I nicked the fabric while trimming down the seam allowance.

Monday, 15 September 2014

One Week One Pattern 2014

It's roundup time! From 6th to 12th of September I took part of the One Week One Pattern challenge hosted by Handmade Jane. It was created by Tilly and the Buttons in 2012 to encourage the sewing community to truly celebrate our favorite patterns. The goal is to go through/survive a whole week wearing clothes made from only one pattern. It doesn't matter if it's one pair of trousers styled into seven different outfits or if it's seven different garments for each day, made with one pattern. When I found out that OWOP was coming this year, I was so excited and knew instantly what pattern I would be using. I guess you all know, it's a no-braine as it seems that lately it's ALL I blog about. Ofc it's the Moneta, how could it not be? So let's take a peek at my week!

Day 1
Day 2

Day 3
Day 4

Day 5
Day 6


Day 7
Day 1: Insanity Moneta paired with white wedge sandals
Day 2: Sweet Lace Moneta with black me-made belt and white wedge sandals
Day 3: Lacy Pleated Peplum Moneta Top with dark blue skinny jeans and work slippers
Day 4: Pleated Peplum Moneta Sweater with dark blue skinny jeans and work slippers
Day 5: Rosy Moneta Top, Delphine Skirt, red tights and flat black leather sandals.
Day 6: Black Moneta with red scalloped collar(yet to be blogged) paired with red me-made belt and flat black leather sandals
Day 7: Red full circle Moneta with long sleeves and black Peter Pan collar(yet to be blogged) paired with me-made black belt and black wedge shoes.

I really liked my week of Monetas. I felt like wearing my PJs all day but in fact I looked like I was putting a ton of effort into my outfits. Haha! Joke's on you, passerby on the street, I threw this on and was done with my outfit in five minutes!
I sure do hope OWOP is going to take place next year as well, I'l already thinking of which pattern I'd like to use for next one. I wouldn't want to use Moneta again, as I would feel like cheating  a bit. And Moneta and I are going to spend a little time apart now. We need to meet new patterns.

While I really enjoyed OWOP and can't wait for the next one, I sure am happy I can be free from the daily selfies. I got some serious flashbacks from Me-Made-May and had to keep repeating to myself that "It's only one week, you can do it!"

***
Did you participate in One Week One Pattern? How did it go? What pattern did you use? I'd love to hear about your week.


Saturday, 13 September 2014

Moneta and Delphine Smashup

So I might or might not have been sitting here, watching the screen for the past hour or two and try to think of a good(ish) introduction for this post and my mind came up with blank. Well it didn't exactly come up with blank, it came up with EVERYTHING BUT something to say in an introduction for this post so....[Introduction]blah-blah-blah-blah, you don't want me ranting about random things anyways and want to hear about these things I made [/Introduction]

So I made a Moneta. Again. I might or might not need an intervention. But that's not really important. What is important is what I did with this version. I've so far done four versions of this pattern: One, Two, Three+Four. And when I was preparing myself to cut out my Myrtle, I realized that if I cut my Myrtle as a top, I can use the rest for a Moneta top. Winner, winner, chicken dinner.


Pattern alterations: I cut the bodice out straight up size M, so no changes there, for the lower part, I placed the bodice piece on top of the lower piece, to have matching seam lengths and then slightly made it wider as much as I could. By now I was really doing some puzzle matching and couldn't morph the top and lower pieces into one. I also realized that I didn't have enough fabric to make the short sleeves that I originally planned, so I decided to make tiny cap sleeves that are slightly ruffled.

I used serger to sew all the seams. I used the twin needle for hemming the bottom and to finish the sleeve edges, armholes and the neckline. I didn't feel like making anything fussy for the neckline and reckoned  a simple twin needle finish would be enough and I quite like it.

Mr.Man, what are you taking pictures of? Beeeewbs.
I think you all have heard/own a copy of Tilly's book Love at First Stitch. It's an awesome book with five printed patterns plus additional instructions to draft two patterns. The book is full of witty comments, smart tips, plenty of directions for different methods and it's all illustrated by gorgeous pictures. After I found my book in the mail, I was obsessed with it, I kept scrolling through it and couldn't put it down. One day I decided to start working my way through it. No matter how many skills you have, it doesn't hurt to go through the basic stuff to reinstate your knowledge.

I skipped the Brigitte scarf(I'm really not a scarf kind of girl) and went straight to the first skirt. The Delphine. And what a delight she is. As the fabric I chose a piece of mystery blend I had in my stash. Is't a grey fabric with tiny white triangles in it. I'm yet to go a burning test to determine the compound of the fabric. Anyways.


I cut out a size four. It seemed to fit my measurements the best and as it was my first version, I decided to keep it simple and test it out. I followed the instructions to the dot(for a change) and when I got to trying it on I saw that the fit was quite good. I loved the length and how it fit my hips. But it was a bit too loose around my waist and only in the top part. So I changed my waistband pieces a bit and took in a bit from the very top of the waistband and gradually connected the lower point of the waistband that fit with the new top point. So in the end I took in a total of 6cm from the top of the waistband while the bottom of the waistband remained the way it was on the original pattern.

Itty-bitty print matching, yo.
For the skirt I finished all the raw edges with my serger, I used a rolled hem to finish the hem and I used an invisible zipper as per instructions. While wearing the skirt I noticed that the fabric is a tad bit too stubborn for the invisible zipper and the fabric gets a bit in the way while unzipping or zipping up the zipper, so I might change the zipper at one point, or I might not, we'll see. The fabric has one other fault as well. It gets stuck a lot, if there's a TINIEST bit of some sort of a surface that it can get it's threads stuck to, it will, so I already have a few white threads sticking out so I need to be really careful of what I'm doing while wearing the skirt and I've got to hide those loose threads when I see them. But that's the fabric's fault and not the pattern's. The pattern is a delight and super easy to make. I'm sure I'll make another one in the future, I already have a fabric for it in my sights.

Wednesday, 10 September 2014

Moneta Pleated Peplum Top 1 and 2

 It feels like all I talk about lately is the Moneta dress pattern by Colette Patterns. A little more and I should start the official Moneta Fan Club(if there already is one, can I join it like yesterday? Pretty please?) I mean I've already posted two dresses(one and two) and I see at least two more emerging from the sewing room. I might need an intervention. Anyways to lessen the post amount dedicated to this insanely versatile pattern, I've decided to treat you guys with a double whammy today. That's right. Instead of one garment I'm going to share two in one post. Woopwoop.


First up is The Lacy Pleated Peplum Moneta Top. After finishing my Sweet Moneta , that I made from moss green lace and white jersey, I started to think what to do with the leftover lace. I didn't have enough for a full dress and I started to think about making it into a top. As the OWOP started to approach, I had the perfect opportunity and idea to make it into a peplum top.


I cut out the bodice and 3/4 sleeve straight up size M. Though for me the sleeves seem more like half sleeves, but whatever, maybe I have ape arms(actually I kind of do have long arms, thanks Mom) I lined the bodice and peplum with white viscose jersey but I left the sleeves unlined. I felt like the lace would be enough to cover the arms and the extra layer of jersey would be too thick around the arm. For the peplum I cut out straight strips that were 23 cm wide and as long as I could cut them. At this point I was running out of lace and had to do quite a bit of puzzle matching to make it work. I stitched the neckline back with the twin needle as I didn't want to add anything that would make the top look too busy. I also had to stitch the seam that connects the bodice with the peplum towards the bodice as it kept pulling itself down in some places and up in other places and it kept looking wonky. To hem the sleeves and the peplum I used also twin needle. .


Diamonds aren't girls best friend, that's a lie. Twin needle is.


 While I was cutting out the Lace Top I kept noticing that my eyes were peeking towards my knit stash and flirting with this ethnic striped knit fabric. Eyes, wat you doing? Eyes, stahp! Nothing I did or said to myself helped. Fine, you slut! Lets flirt with these both at the same time. So I cut out two tops at the same time.


This fabric has been in my stash for about three years now. It's a wool and viscose blend and it feels like unicorns giving me hugs. Can't all fabrics feel like this? I got it from Abakhan when I went to buy a spool of thread and this seducer called to me. Buy me! You'll sew me into something gorgeous in no time! I won't take any space! You know you want me! Touch me! Love me! Buy me! So I wiped off the drool from my face and bought the last piece they had, which was around 1,25m and I promised myself that by the end of the month this piece of fabric will be on my body as an awesome garment. Like always, I couldn't be more wrong. It kept taunting me from the stash shelf and I felt the pressure. Nothing I thought of felt like it would make the fabric justice and I kept pulling it out and putting it back. I think the fabric and I were waiting for this project.


Construction wise it's pretty identical to the lace top. Only I placed the pleats a bit differently. And for the neckline I cut out a strip from the fabric to have a cool effect of the print running around my neckline. Instant necklace! Yes, I would love that, thank you. I cut the strip as a straight piece and sewed it on as I would sew on a regular bias tape. As it's a knit that had a lot of stretch it didn't need to be cut as a bias tape.


The hem and sleeves are also finished with the twin needle and all the seams are serged for both tops.

****
The Moneta is definitely mu TNT pattern. What's yours? Or have you ever felt like you have been waiting for years for the right pattern for THAT fabric in your stash?