Showing posts with label Self drafted. Show all posts

Wednesday, 14 September 2016

Amy Dress

That moment when someone in your family is getting married and it's taking up all your time after you just got your blogging groove back. Whoops. But I'm back again with another self drafted dress. After this post I'll be returning to showing you things I've made with other's patterns.


This is the Amy dress which is a nice summer dress with a cotton lining and linen fashion fabric which has pale blue stripes. I had to attend a nautical themed party and instantly thought about a dress made from blue-white striped fabric. And to my luck I found the perfect fabric which had the stripes running lengthwise which is quite rare in the shops in my area. As horizontal stripes make me look shorter and wider than I actually am, finding this fabric was like winning the jackpot on the lottery.


For the bodice I used my own bodice block which I drafted last year. The skirt is a 3/4 circle skirt and has pockets in the side seams. The lining skirt is a half circle skirt. I left the bodice seam allowances raw as I stitched the waist seams of the main layer and lining together and there should be minimal fray. The skirt seams are finished with the serger and both of the hems are rolled. The dress fastens with an invisible zipper in the left side seam.


This dress makes me wish the summers were longer here as it's such a great dress to wear but it's not appropriate for the colder seasons. *sob*

Thursday, 1 September 2016

Hailey Dress

The weather today is absolutely horrible, so I'm going to look at photos taken on a nice summer day and talk about a pretty dress. Maybe it'll make the weatherman feel guilty and make the weather nice again?

This is the Hailey dress. Made from my bodice block(which I also used for this dress). The fabric is a lovely lightweight linen and cotton blend that I bought with the idea of a simple dress. And finally it became what it was destined for - a dress with a fitted bodice and gathered skirt.


The bodice is lined with a light cream cotton fabric. The raw seam allowances of the skirt are serged and the hem is also serged and then turned back and stitched down. The dress fastens with an invisible zipper in the center back.


I love this dress so much. It's one of my most worn pieces of the summer and I am no where near being done with it. The only downside of Hailey is that the fabric is so light that it flows a bit too much in the wind and I've had a few incidents where I've gotten VERY close to pulling a Monroe. Maybe I should sew a strip of lace to the hemline to weigh it down?

Monday, 30 May 2016

Rayna Dress.

 Today I have a treat for you. When it comes to sewing for myself, I usually use patterns made by others as I don't feel like drafting a pattern for myself after I've dealt with drafting patterns for everyone else. Cobbler's children and all that. But when I was working on making my own wedding dress I decided to kill two birds with one stone and made me a bodice block that fits me. Since then I've used it a few times and this is one of the results. The Rayna Dress.


I had to attend a birthday party of a near and dear relative who turned 80 years old. I decided to make a simple dress with the fabrics I had in my stash. I had two rayon fabrics with sheer patterns and even though the pattern was slightly different, I figured it wouldn't make too much of a difference and would add an interesting twist. I also wanted to use this red cotton I had in my stash and decided to line the dress with it and add a contrasting waist piece.


I didn't want the seam allowances to be seen through the main fabric so I decided to use the red cotton as an underlining in the bodice. I finished the seams with the serger and used a bias tape to finish the neckline and armholes. 


I encased the bodice in the waist seam and sewed the two skirt layers simply onto the waist pieces, serged the seam and press it towards the waist. I also inserted an invisible zipper into the left side seam.


The hem of the main fabric is finished with the rolled hem setting on the serger. For extra oomph for the skirt, I finished the lining skirt with a horsehair tape and I love how much the skirt flares out. Makes me feel like a million bucks. Especially when paired with a killer pair of red shoes.


Monday, 25 April 2016

Something Old & Something New - A Self drafted wedding dress

A bride approached me with an interesting dress conception. She had a blouse with lace front and cotton back+peplum. She wanted me to use that lace from the bodice for her wedding dress bodice front. And then she pulled out three more fabrics. A nude netting, white floral lace and a peach chiffon. "Combine a dress for me from these" She then begun explaining what she wanted where. I would be lying if I said I wasn't overwhelmed by all this.


So this is the result of her idea. See through front, a netting back with some of the flowers from the skirt lace hand sewn on the netting plus some flowers around the armhole. She said she felt insecure about her armholes showing and this was our solution. The front lace stayed the same shape as there wasn't much to work with to begin with. The lace skirt is a semi circle with a train. The chiffon under the lace skirting is gathered at the waist and also has a train.


The dress fastens with buttons in the front until mid thigh so she can show off her legs while dancing. As the bodice area is very light and the white lace fabric is VERY heavy and would drag the whole dress down, I built in a waist stay that fastens with hooks and holds up the weight of the dress.


My favorite part of this dress is the train. She would have liked it to be even longer but I simply didn't have fabric for longer train. However she did like the fact that she can easily hook her finger through the lace and carry the train when she felt like. I attached the chiffon layer of the skirt to the lace with a tread chain.


And that's it. A wedding dress combined of four very different fabrics. The dress isn't something I would wear, but I still think it's pretty. And the bride was very happy with the result. The train, buttons, slit, bodice, see through bits were everything she wanted. Some brides go for modesty, some for sexy.

Thursday, 31 March 2016

Woolen Circle Skirt + a Giveaway&Discount!

Hi. Today I have a really short post which will get me back on track with blogging. A self drafted circle skirt with pockets. 


The skirt itself is a basic circle skirt drafted based on my measurements. For comfort and stashing purposes I added inseam pockets to the side seams. The skirt fastens with an invisible zipper. The seam allowances are finished with a contrasting red overlocking seam and is hemmed by hand with invisible stitching.


The fabric came from my stash. It traveled there after my gran moved out of her house and in with my parents and found a bunch of fabrics from her closets and gave said fabrics to me. This was one of those fabrics. It is a woolen and synthetics blend. Which mean it's warm without feeling too thick or woolen(if you know what I mean)


I love the movement of this skirt and it's perfect to wear with a fun shirt or a blouse. A true wardrobe staple. I've been distracted by fun prints and discarding "boring" basics sewing that it has been challenging to find cohesive outfits at times. So I made a commitment to sew a few basic items that can be mixed and matched with multiple items in my wardrobe.


Now for the Giveaway and a Discount.
I am giving away 20€ to use in my Etsy shop. For details how to enter, read this post on Instagram. Additionally I am offering a 10% discount in my shop with the code HURRYUPSPRING (code is valid until 10th of April)

Tuesday, 1 March 2016

Self Drafted Grayscale Coat

While I settle the disagreement between me, the camera remote and camera focus, I'll share something I finished last week and not last year. Shocking, right?

One day, a woman came by the studio with a woolen coating fabric which she bought somewhere in the 70's or 80's and wanted me to make her a coat. But she said she had no idea what she wanted. So little by little we started to determine the make and look of the coat. First the season. Winter or spring/fall? Neither, more like something to wear between the two seasons. The shape-simple and straight, long enough to hit her mid thighs. Single breasted or double? Double. What about the collar? No idea. She couldn't decide between a simple straight collar and a lapel collar. After the first fitting she decided to go for the lapel collar, and this is the final look.


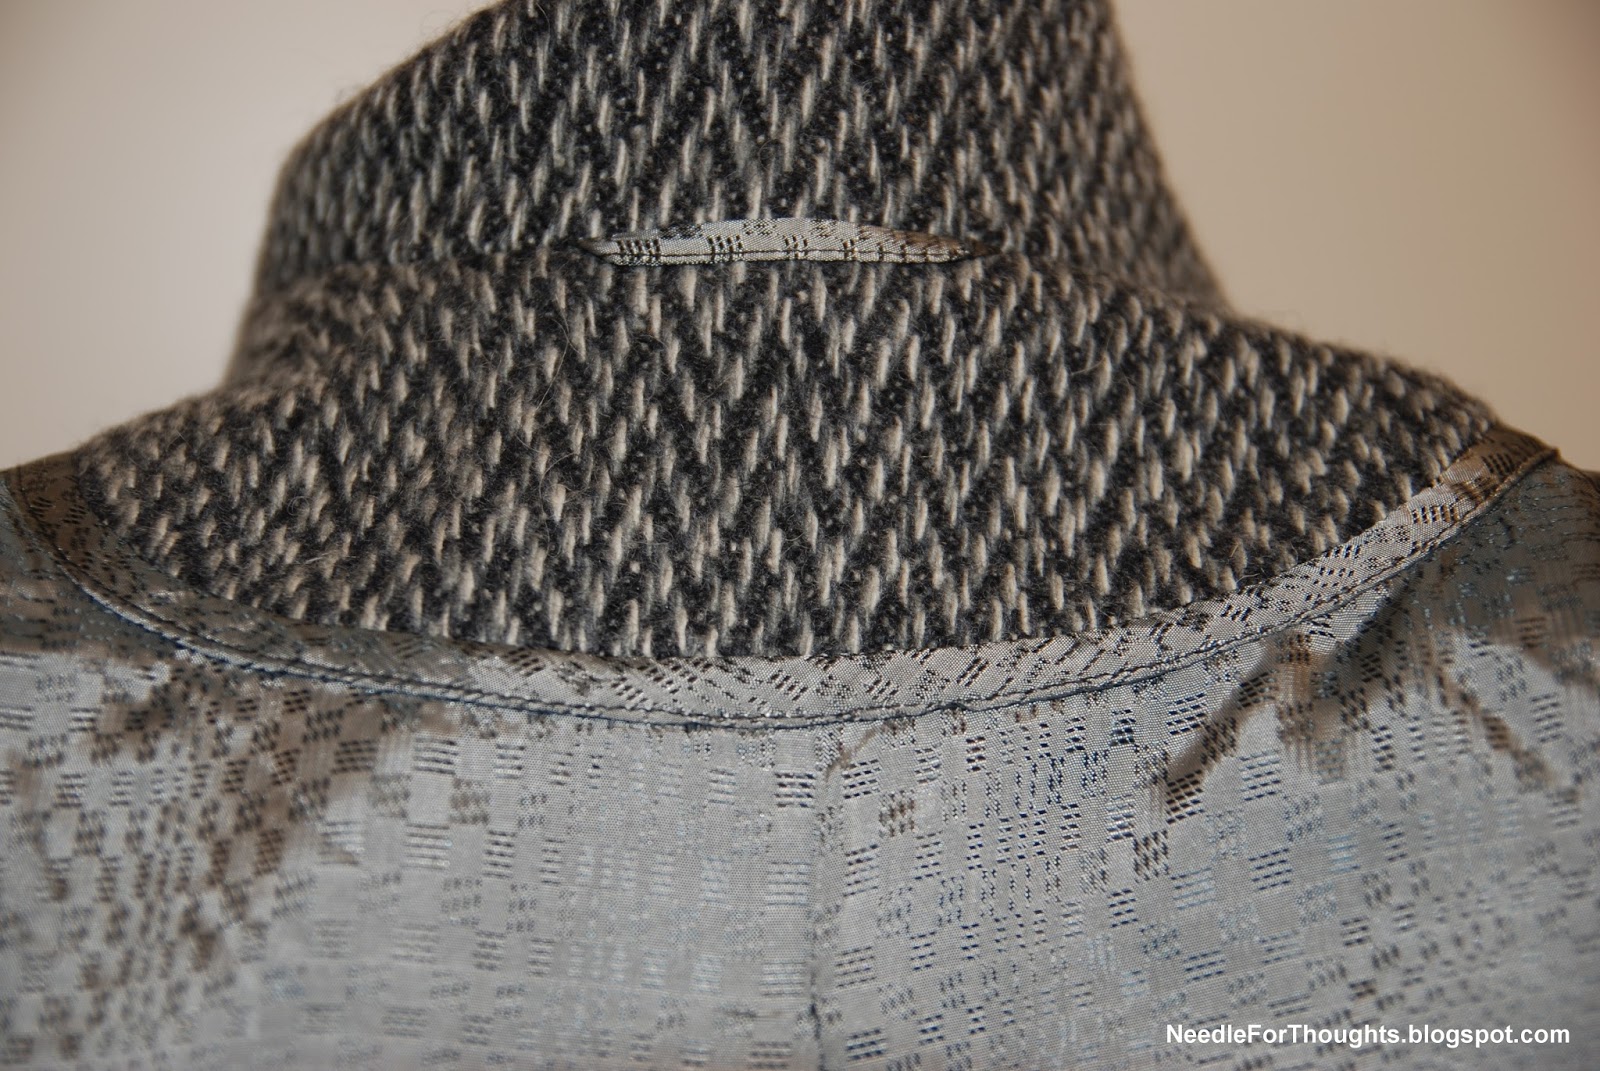
A simple straight coat with double-breasted buttoning and slight shaping at the waist. The coat has princess seams, a vent in the back and pockets in the seam between center front and side front panels.


The main fabric is a lovely 100% wool vintage coating and filled the studio with the most delicious wool smell whenever I approached it with steam.


I top stitched all the seams but the stitching is virtually invisible in the woven pattern. The only topstitching seam that is sort of visible is the one at center front and collar.


The thing about this fabric is that the seams and details blend in so well with the asymmetrical pattern, it almost looks like it's made of one big piece of fabric. The pockets are virtually invisible. And to think I did zero print matching. Simply pressed the fabric, trued the grain and blindly put the pattern pieces onto the fabric and cut.


The lining is a grey viscose lining with a cool pattern composing of squares and circles. To add a bit of more warmth and keep the wind from blowing through the fabric, I added a layer of interlining.


 I also made a breast pocket into the right side. For that I cut the right front facing with a little extra area for the pocket. This way there's less seaming and the pocket is stronger and more stable. There's a small tab for the button so that the pocket can be closed.


I also sewed a hanging loop between the collar and back facing. I hate it when people hang their coats and don't put them on coat hangers but what can you do. Besides, in some places, the coat holding desks don't accept coats without a loop to hang it with(looking at you, theatres).


This coat was a delight to make and I seriously loved the fabric. Working with an all naturally made coating fabrics is a rare occasion around here. It's just so darn expensive to buy nowadays.

Tuesday, 16 February 2016

Yellow Dream- A self drafted dress

Happy Tuesday! Today I have a simple yet beautiful dress to share with you. 


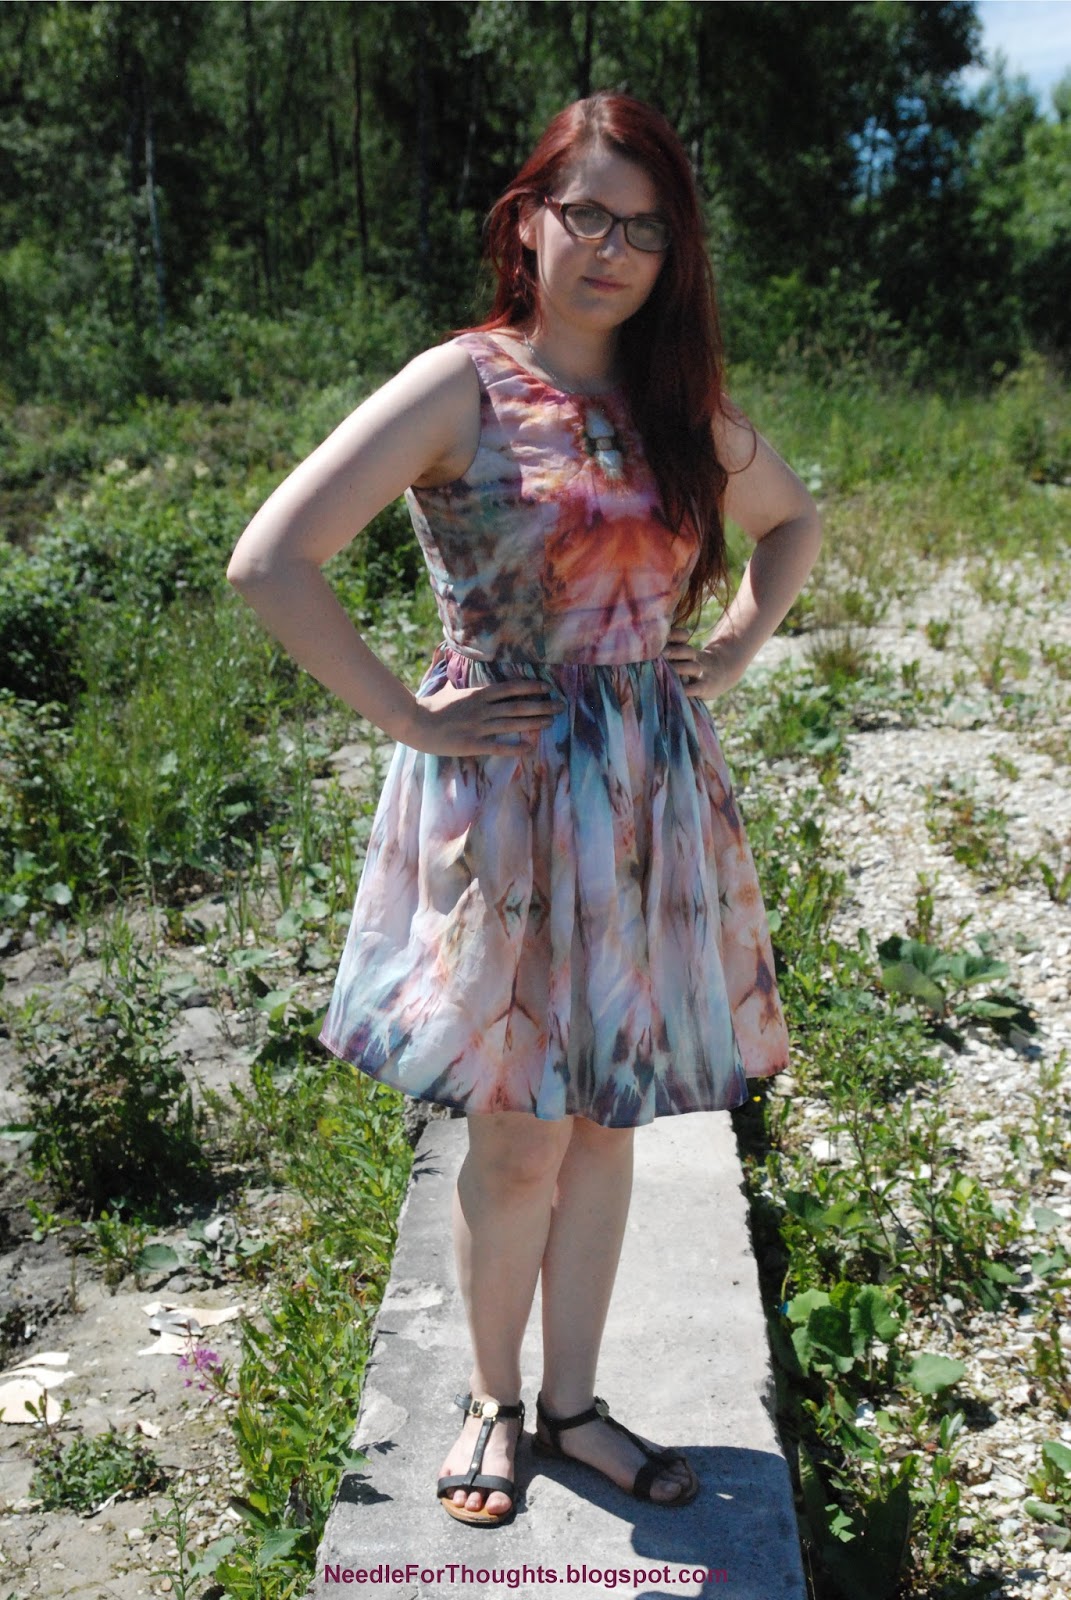
This is a dress with a fitted princess seamed bodice, gathered skirt and cap sleeves I made last summer for a customer who said she was in the fabric shop, saw this fabric and simply could not leave it behind.


The pattern is self drafted and this shape seems to have become the most popular look in my studio for both selfish and commissioned sewing.


I finished the raw seam allowances with my overlocker and sewed a facing to the neckline. To finish the armholes, I sewed the cap sleeves to the armscye, overlocked the sleeve head and finished the bottom of the armhole with a bias tape. The sleeve and hem of the dress are finished with a rolled hem. And the dress fastens with an invisible zipper in the center back.


I hope this splash of yellow brightens up your week. I am desperately craving some sun and summer and it definitely is showing on my sewing project prep list. I have been prepping and cutting future makes like there's no tomorrow and I would be lying if it weren't mostly bright and summery.

Friday, 12 February 2016

Textured Black Dress

Happy Friday! Or if you've had the week I have, Friyay. After a week of numerous alterations, three dresses and two coats, I am dead tired and very thrilled about the weekend. But before I can head off to a weekend filled with family time, photoshoots, sleeps and dog walks, I'd love to share a dress I made for a customer. 

The same woman for whom I made this skirt, came to me and showed me this fabric and said she absolutely needs a cute little dress she can dress up and down according to the occasion. She didn't want any fuss or bling, a simple sleeveless dress with a fitted bodice and a fuller skirt. At first she couldn't decide whether she'd rather have the skirt pleated or gathered and we decided to see in the fitting which one she liked the best. So for the first fitting, half of the skirt was gathered and half was pleated. In the end we went for gathered look as it looked more harmonized with the fabric.


The main fabric was a knit which was combined of two thin layers. The top layer was attached to the bottom in a way that created this cool textured pattern in the fabric. The dress is also fully lined with the same fabric as I used for this skirt, this dress and this skirt.


The dress fastens with an invisible zipper in the back and the skirt seams are finished with overlocking. The main fabric skirt is hemmed with a twin needle and the lining is hemmed with a rolled hem.


I think the fabric is what truly makes this dress. It was a bit tricky to sew and was blunting my needles three times faster than usual and unpicking seams was not an option as it showed every sewn seam. But in the end it was worth it.


Here's a shot of the lining. Black is such a hard colour to photograph. Nothing really shows. But I promise you, it looked absolutely marvelous in real life. Also pardon the ragged look of my size small dress form, she really needed a change of clothing. And I have re-covered her by now with a cream fabric which should look better for photographs.

Tuesday, 9 February 2016

Preachin' for the Choir. A self drafted blouse

You wouldn't believe the backlog of of things I have that I want to blog about. So for now I have lined up two posts per week until I am all caught up with my makes.

Here's a blouse I made for a customer. A senior lady came to my studio and said that she joined a choir and needs a shirt to wear when they are performing. Then she pulled out this fabric and said that everyone in the choir have shirts made of the same fabric but with different designs. And she started to describe the shirt she wanted.


She wished to have a semi fitted shirt with 3/4 sleeves, a small collar and a slit in front without any buttons. A simple shirt that would let the fabric be the star. And that's exactly what I gave her. A self drafted choir blouse.


The fabric itself is a cotton and viscose blend knit and felt heavenly. The right side had a bit of sheen to it and the wrong side was so soft I wanted to keep petting it. It really felt skin friendly and breathable.


I finished the seams with my overlocker, hemmed the sleeves and shirt with my beloved twin needle(oh how I wish I had a coverstitch). I topstitched the collar and collar stand to give it a more crisp look. I skipped interfacing the collar and stand as the fabric was behaving so nicely and I did a test piece with knit interfacing and the result was a bit too bulky. To make the slit, I sewed two welts to the center front, turned them inside and stitched the seam allowances down.


And that's it. It was a relatively fast and easy project and the fabric made it a delight to make.


PS. If you've noticed, there are now little markings on my blog photos with my blog name(I'm slowly updating all the photos). And if you are following me on Instagram, you might know the reason why. A few weeks ago, I discovered that someone has been stealing my blog content. Pictures, text, everything. I reported it and it has been taken down by now and it's over. But it was an eye opener. And I decided to try to protect my content a little bit better and the first step is adding my name to the pictures. If you have any advice and tips on how to prevent this from happening again, I'm open to suggestions.

Monday, 5 October 2015

Summer Rush Skirt

I was approached by a woman who had a skirt problem which was she needed one for her holiday in Greece. Only problem was she was leaving in a week. Time management at its finest. But as she wanted a relatively simple maxi skirt, I decided to give her a hand and bump her up the work list.


She wanted a skirt that would flow and be wide at the bottom but wouldn't have any gathers or pleats at the top. And it was supposed to be held up with a wide lycra waistband that would cover half of her hips. So I measured the piece of fabric she brought me and decided to cut out a semi circle skirt.


Another problem arose when it came to lining. The main fabric was quite sheer and would become slightly seethrough in natural lighting, so it needed a lining. But the customer didn't want the lining to be as big as the skirt as it would create too much volume in the bottom and she was scared it would show when the main fabric would move around in the wind. She also hated the idea of a half lining that reaches only the knees. So we agreed that I'd cut out an a-line lining and we'll see how she feels about that. Luckily she liked it and the lining issue was solved.


All the seams were finished with my trusted serger and the hems were roll hemmed.


Monday, 28 September 2015

Our Wedding: The Dress

How can it be that you want to write a post soo bad but at the same time you really don't want to write it? Because that's the case with this post. I want to share my wedding dress with you lovely people but at the same time I want to keep it to myself. Maybe subconsciously I know that once I put these words and pictures here and hit "Publish" the wedding is officially over and the post-wedding bubble will pop? Whatever the reason, I have been putting it off for long enough and it's time to deliver what I have promised. This is the first post of my wedding series(there are three in total) and it is about THE dress. Ta-dah!

The elusive Mr.Man. In front of the camera for once.

Most girls dream about their wedding day and their dress their whole lives while growing up. I wasn't one of those girls. So when it came to deciding on what kind of a dress I wanted, I was lost. I had no clue. I wanted everything and nothing at the same time. Something that would pop out and be special but that's simple at the same time. So I browsed the internet a lot and after a while I had the idea down. A full lace gown with a sweetheart neckline and lace covering the upper bodice and with a cute keyhole detail in the back.Then came the hard part. Pattern, fabrics and sewing.

When it came to finding the fabrics, I was in luck. I stumbled on a storewide sale of 60% off all fabrics and got the main creme viscose fabric for only 4€/m. Unfortunately by the time I got there, all the good laces had been already cleared out. But luckily a few weeks later I found another sale in another shop and got the lace for 6€/m. 

Originally I had planned on making a built in corset to the bodice but I accidentally found a lingerie corset with proper boning on sale for 14€ and decided to buy it instead and make my life easier a little bit. But despite skipping the boning and other headache inducing steps that come with corsets, I decided to underline all the bodice(both main and lining) pieces with a medium weight cotton fabric to give the bodice more structure and strength. 

Another step I added to the bodice was making a double fastening. On the outside it seems it's fastened with an invisible zipper but on the inside it's pulled tight around the bodice with hook and eye tape. This is to reduce the pressure on the invisible zipper so it can be closed easily and it won't be causing any wardrobe malfunctions by popping open. Also I really liked the secure feeling I felt while wearing the dress. It was NOT going anywhere. Even if I were to decide I didn't like the lace on top and wanted to ditch it at the last minute. The dress would hold itself up, no shoulder straps needed.

I drafted the pattern myself and made quite few muslins to tweak the fit of the strapless part. The skirt of the dress is actually two different shapes. The main fabric is gathered in the waist and simply flares out due to the amount of gathers. And the lace is a semi circle skirt. For the skirt lining I cut out a simple a-line skirt that is long enough to reach my knees. There really wasn't a need for a skirt lining but I was scared the fabric was a little bit too light and under certain light could show something that's not supposed to be seen. 

To avoid any need for seam finishes, I french seamed all the seams. And let me tell you, installing an invisible zipper into two different layers of french seams is a b***h. But still worth it. The raw edges of the lace in the center back, neckline and armholes were finished with a bias tape and fastened with self covered button in the top. Both the hems of lace and main fabric+lining were roll hemmed.


Looking back, I could have tweaked the fit of the lace in the back a bit more, but overall, I really love this dress and Mr.Man promised to love me forever while I wore this dress so I'm gonna say it was a good day.

Thank you for reading. This has been the first part of Our Wedding story. Here are all Our Wedding Posts.
Our Wedding: The Second Day & DIY

Thursday, 27 August 2015

Layered Skirt + Technical Difficulties Update.

Before I start talking about this skirt I made, I have to say something. Some of you might have noticed something weird happening with post uploads in the last week or so. Posts that have already been uploaded have been taken down and uploaded again which triggered the notification system for the e-mail subscribers and Bloglovin. For that I appologize. About two weeks ago my PC's motherboard died on me without any warning. So I had no physical PC to work behind for blog posts. I tried to keep the blog alive via phone but the Blogger app on phone is confusing and feels limitating. Especially as when you want to edit a typo in an already published post, it takes it down and re-publishes as a new post. Luckily now thanks to Mr.Man I again have a working computer and I can return to normal means of blogging. Also, before you freak out, we managed to retrieve all the files so no pictures, pdf patterns, etc were lost so at least there's that. Again, I appologize for any inconvenience the new post notification system caused.


Now. On to sewing talk. I made this maxi skirt in June. The customer at first wanted to have only the two layers of the main fabric but luckily I was able to convince her that she needs at least a short linging as the fashion fabric was pretty see-through without it.


The main fabric is a polyester knit that has a wrinkled look and had been collecting dust in the customer' closet for years. She also found the elastic band from her house and said she has no idea when and why she bought it. But sometimes things don't need to make sense, they just need to work. And by sheer coincidence, these two work together like a charm.

The lining is a viscose and polyester blend from my stash.


To finish the seam allowances on the main fabric, I used my serger and for the lining I used french seaming. To hem the lining I used rolled hem and for the main fabric I created the lettuce hem with my serger. (Like for this dress)


The pattern is self drafted and by that I mean, I drew a box on the fabric, made it slightly wider at the bottom and cut it out. And then did the same thing only slightly shorter. Nothing fancy or tricky.